 |
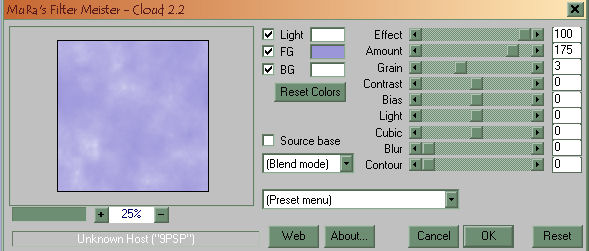
Simple Frame Tag Tutorial Supplies Here -Ready to Start- To complete this tut you will need Mura Meister Cloud Filter. You can get it here: You will also need Graphics Plus Cross Shadow filter. You can get it here: You will aslo need the Xero Porcelain filter. You can get it here: And finally, you will need the Shaphire Filter. I could not find a site to download this filter again. So I have included it in the supplies. Open new image 600 x 600 Flood fill using the following color: #b0aae1 Go to Effects/Filters/Mura Meister and choose the cloud filter. Apply to the image using the settings as seen below:
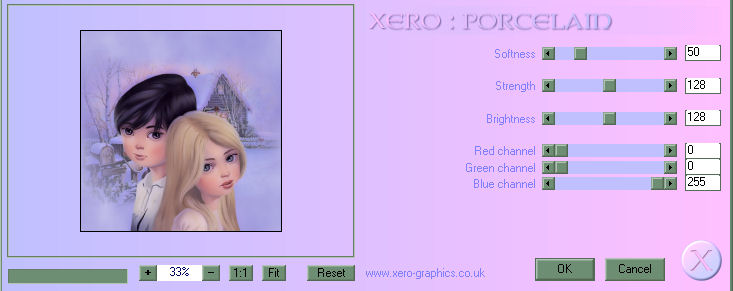
Open misted scenery image from supplies and Copy/Paste as new layer onto the image. Now open the girl/boy image from supplies and Copy/Paste as new layer onto the image. Place the girl/boy tube to the bottom. See my image for reference. Place your name or whatever text you wish to the image. Note: I used font type Liberty BT. Size 26. Now go to Layers Menu and choose Merge All. Next to Effects/Filters/Xero and choose the porcelain filter. Apply using the settings as seen below.
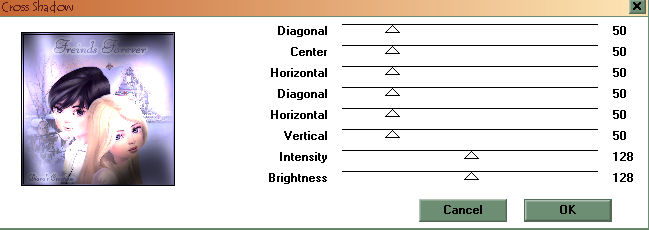
Now, we are going to make a gradient that we will need for the borders. Set your foreground color to #968bce and your background color to #c8c5ec Open the materials properties box and click on the gradient tab. You should see a purple color gradient with the colors we just chose. Set the foreground color to this gradient. Now go to Image/Add Borders and add a border 1 pixel wide (symetrically) using color black. Again to Image/Add Border and add a border 4 pixels wide using the following color: #b0aae3 Using the Magic Wand, click on the border you just created. Flood fill this border with the purple gradient. With the border still selected, go to Effects/Filters /Graphics Plus and choose Cross Shadow. Apply to the border using the settings as seen below:
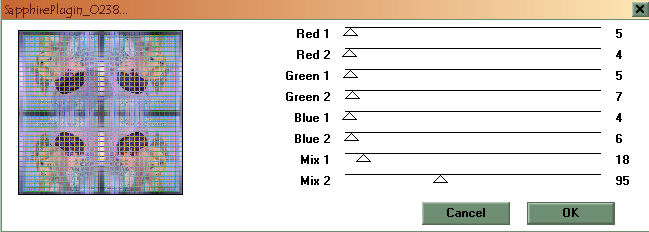
Once applied, go to Selections Menu and choose Select/None. Back to Image/Add Border and add a border 1 pixel wide using color black. Once again to Image/Add Border and apply a border 20 pixels wide using the following color: #b0aae3 Using the Magic Wand, click on the border you just created. Flood fill the border using the purple gradient color. Go to Effects/Filters/Graphics Plus and choose Cross Shadow. Apply to the border using the same settings as before. Once you have applied the Cross Shadow and with the border still selected, go to Effects/Filters and choose the Saphire filter. Apply using the setting as seen below:
Go to Selections Menu and choose Selct/None. Now add 3 last borders using the same first 3 steps as you did with the first three borders we created. |
|
Any resemblance to any other tutorial is coincidental Property of Diana's Creations |